NiView App on your Mac, MacBook Pro, MacBoo Air - Download
In the age of connected devices and smart security, ensuring the safety of your home, office, or other properties has never been more important. One of the most effective ways to stay vigilant is through security systems like NiView, which provide real-time video monitoring, security alerts, and instant communication features.
While NiView is popular on mobile devices, many users prefer using it on their computers, especially on larger screens like those offered by MacBooks or iMacs. Using NiView on your Mac device allows you to take full advantage of its live streaming and other security features with better visibility and enhanced functionality.
In this comprehensive guide, we will walk you through the step-by-step process of installing the NiView app on your Mac, along with troubleshooting tips and additional information on how to make the most of the app once it’s up and running.
What is NiView?
NiView is an advanced security application that integrates with security devices like cameras and sensors to provide real-time monitoring and alerts. It allows users to:
Monitor live video feeds from connected security cameras.
Receive instant alerts when suspicious activity is detected by motion sensors or cameras.
Send and receive messages to communicate with people on or near your property.
Share videos and images of any events directly from the app.
NiView is compatible with a variety of security hardware, including indoor/outdoor cameras, doorbell cameras, and motion detectors. By pairing your NiView device with the app, you can monitor your home or office, communicate with family members or employees, and act quickly in case of emergencies, all from your Mac device.
Why Use NiView on Your Mac?
While NiView is available for Android and iOS devices, many users prefer the larger display and more powerful processing power of a Mac. Here’s why:
Larger Screen: A Mac offers a much larger screen compared to mobile devices, making it easier to view live video feeds, control multiple cameras, and manage your security system.
Better Performance: A MacBook or iMac provides more stable performance and quicker load times than mobile devices, especially when handling high-resolution video feeds.
Enhanced Multitasking: With a Mac, you can run NiView alongside other applications such as web browsers, productivity software, or messaging apps, without the need to switch between apps constantly.
More Comfortable Navigation: With a mouse or trackpad, navigating through NiView's features can be quicker and more precise than using touch controls on smaller devices.
Now that we know why NiView is a great app to use on your Mac, let’s dive into how to actually get it installed.
How to Get & Install NiView on Your Mac?
As of now, NiView does not offer a native macOS version of its app. However, you can still run the NiView app on your Mac using an Android emulator. An Android emulator allows you to run Android apps on your Mac, essentially turning your Mac into an Android device.
In this guide, we’ll be using BlueStacks, one of the most popular Android emulators, to install and run the NiView app on a Mac.
Step 1: Download and Install BlueStacks
BlueStacks is a powerful Android emulator that allows you to run Android apps on macOS. Here’s how you can install BlueStacks on your Mac:
Go to the BlueStacks website: Open your web browser and navigate to the official BlueStacks website.
Download BlueStacks for Mac: On the homepage, you will see a Download BlueStacks button. Click on it to download the installation file for macOS.
Install BlueStacks: Once the download is complete, locate the BlueStacks installer file in your Downloads folder and double-click it to start the installation. Follow the on-screen instructions to complete the installation.
Launch BlueStacks: After installation, open BlueStacks from your Applications folder or the launchpad. When you open BlueStacks for the first time, it may take a little while to load as it sets up.
Step 2: Set Up Google Play Store on BlueStacks
Before you can install NiView, you need to set up the Google Play Store on BlueStacks. This is the same process you would follow if you were using an Android device.
Sign in to Google Play: When you first launch BlueStacks, you will be prompted to sign in with your Google account. If you don’t already have a Google account, you can create one by following the on-screen instructions.
Access the Google Play Store: Once you’ve signed in, click on the Google Play Store icon in the BlueStacks home screen to open the store.
Step 3: Search for NiView in the Play Store
With the Google Play Store set up, you’re ready to search for the NiView app.
Open the Google Play Store: Click on the Play Store icon inside BlueStacks, which will open the store interface.
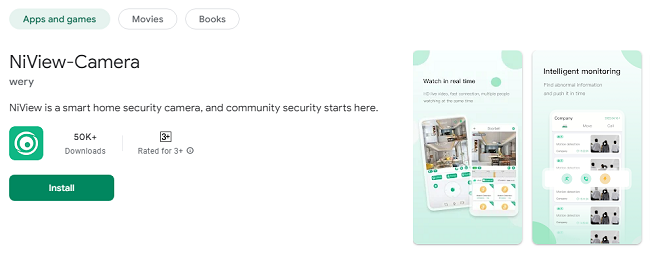
Search for NiView: In the search bar at the top of the Play Store window, type "NiView" and press Enter.
Find the NiView App: Browse through the search results and click on the NiView app to open its details page.
Step 4: Install NiView on Your Mac
Now that you’ve located the NiView app, it’s time to install it.
Click on the Install Button: On the NiView app page, click the Install button to download and install the app on BlueStacks.
Wait for the Installation to Complete: The installation will take a few moments. Once it’s done, you will see the NiView icon on the BlueStacks home screen.
Step 5: Open NiView on Your Mac
Once NiView is installed, you can open the app and begin using it on your Mac.
Launch NiView: From the BlueStacks home screen, click on the NiView icon to open the app.
Sign In or Create an Account: If you already have a NiView account, sign in with your credentials. If not, you can create a new account by following the instructions in the app.
Pair Your NiView Devices: Follow the on-screen instructions in NiView to pair your security devices, such as cameras or motion sensors, with the app. Once paired, you can start monitoring your property from your Mac.
How to Use NiView on Your Mac?
Once NiView is up and running on your Mac, you can begin using it to monitor your security devices and keep an eye on your property. Here’s a brief guide to the key features you’ll want to explore:
1. View Live Video Feeds
NiView allows you to monitor live video feeds from your connected cameras. Whether you’re keeping an eye on your home or business, you can easily switch between multiple camera views to get a comprehensive look at your property.
2. Configure Motion Alerts
One of the most powerful features of NiView is its ability to send real-time notifications when it detects motion or suspicious activity. You can configure these alerts within the app to receive immediate updates.
3. Share Videos and Images
If you notice anything unusual while monitoring your property, you can instantly share the video or still images with others. NiView makes it easy to share these files via email or social media platforms.
4. Messaging and Communication
NiView supports two-way communication, allowing you to send messages to people on or near your property. This feature is especially useful for businesses with remote staff or for homeowners who want to communicate with family members.
5. Remote Access
One of the benefits of using NiView on your Mac is the ability to access it remotely from anywhere, whether you’re at work, traveling, or simply in another room. As long as you have an internet connection, you can monitor your property from anywhere.
Troubleshooting Tips
While the installation process for NiView on your Mac should be straightforward, you may encounter some issues. Here are some common problems and their solutions:
1. BlueStacks Not Running Smoothly
Solution: Ensure that your Mac meets the system requirements for BlueStacks. If the app is running slowly, try closing other applications to free up resources.
2. NiView Not Installing
Solution: Make sure your internet connection is stable. Try restarting BlueStacks or reinstalling the app.
3. NiView Not Launching
Solution: If NiView isn’t launching, try restarting BlueStacks. If that doesn’t work, uninstall and reinstall the app.
4. Lagging Video Feeds
Solution: A lagging video feed may be caused by a slow internet connection. Ensure your Wi-Fi connection is strong or use a wired connection if possible.
Conclusion
Installing the NiView app on your Mac allows you to take full advantage of its powerful security features on a larger screen. By using BlueStacks, you can easily run the NiView Android app on macOS and start monitoring your security devices right away. With features like live video streaming, real-time alerts, and messaging, NiView offers a comprehensive solution for staying connected and securing your property.
Follow the steps outlined in this guide to install NiView on your Mac and enjoy a more efficient, user-friendly security monitoring experience. Whether you’re at home or on the go, NiView ensures that your property is always under your watchful eye.
Trending Now
Updates